Cosmos
The Cosmos tableau is displayed by selecting "Tableau" | "Cosmos" from the main menu,
or by clicking the  "Cosmos" Toolbar button.
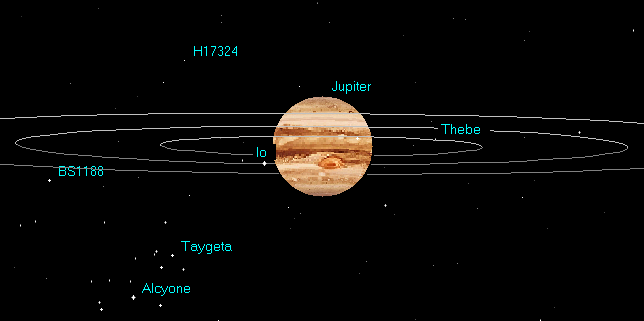
The tableau presents a 3D view of the Solar system as it would be seen from a point in space. Planets, their orbits, and background stars are visible. The view is authentic - objects are drawn to scale and in their correct position for the select moment in time.
When the tableau is first displayed (or redisplayed), it uses the current event-data date and time. This is updated if you use Dynamics of Time or Location operations in the tableau. However, if you select Motion for the tableau (see section below), this will not affect the event-data.
Pausing the mouse pointer over any object in the tableau (planet, star, asteroid) displays its name or designation in a popup info tooltip.
To orient the observer, at top-right the tableau has an X/Y/Z-axis vector for the system of rectangular ecliptical coordinates used in the tableau. At top-left is displayed the distance in Astronomical Units (au) from the central object of the tableau to the observer, and the rectangular ecliptical coordinates of the observer relative to this object.
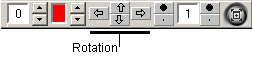
To reposition the viewpoint click in the tableau and drag the mouse with the button held down, or use the four arrow buttons at the right of the Toolbar (keep pressed for continuous rotation). Vertical X-axis movement rotates the angle of sight, horizontal Z-axis movement relocates the viewpoint around the system.
You can also use the cursor (arrow) keys on the keyboard:
- press the arrow keys alone for smooth movement,
- press the Ctrl key together with the arrow keys for faster movement,
- press the Alt key together with the arrow keys for fastest movement.
- press the Shift key together with the arrow keys for very slow movement.
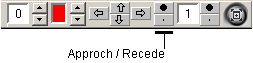
To approach or withdraw from the central object, click the "Approach (Home)" bullet button or the "Recede (End)" point button on the Toolbar,
or use the Home and End keys. You can obtain faster movement by pressing Ctrl+Home and Ctrl+End, or Alt+Home and Alt+End. For very slow movement use the Shift+Home and Shift+End key combinations.
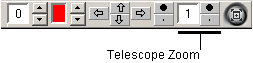
The Approach/Recede facility differs from the telescopic Zoom In/Out option. The former simulates smooth actual movement thru real space, the latter is the equivalent of stepping the zoom level in a telescopic view of the object. These functions differ in the type of perspective they create.
To operate the telescopic Zoom function click the "Zoom In (PgUp)" bullet and "Zoom Out (PgDn)" point buttons located on the Toolbar,
or use the "Page Up" and "Page Down" keys.
Sometimes extremely slow movements are needed (e.g. to view eclipses). In this case set the "Speed of Movement" divider to a different factor:
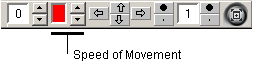
Pull down the red bar to reduce the speed by a factor of 10, 100 or 1000.
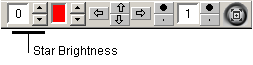
You can increase and decrease the imaged brightness of stars using the "Star Brightness" buttons:
The Cosmos tableau can be animated (see Dynamics of Time).
Right-click the mouse for a popup menu. (Some menu options may be unavailable, depending on the object under the mouse pointer). TIP: to ensure menu options are correctly enabled for the object, wait until the tooltip name or designation is displayed before clicking.

Jump
The Jump option transitions (teleports!) the observer within the system to the chosen planet or star. After jumping, the selected object will be at the center of the tableau.
If you teleport too far from the Sun, you can get lost among the stars. If that happens use the "Return to Sun" menu option.
Astronomical Data
This option displays a window of astronomical data on a planet and star. The planet data window consists of two pages:
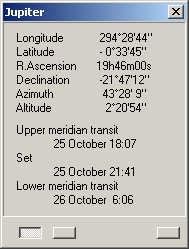
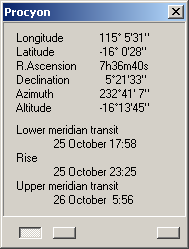
The first page displays current coordinates of the planet and times of events: rising, setting, upper and lower meridian transit (3 out of 4 of these points are always displayed, depending on the horizontal planet location).
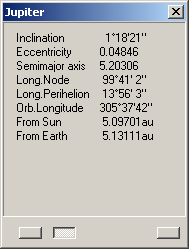
The second page displays the planet's orbital parameters and distance from the Sun and Earth.
The star data window depends on the observer's location in the system. If it is in the Solar System, the 1st and 2nd of the pages below are used; if it is in a different star system, the 3rd page is shown:
The first page displays the current coordinates of the star and times of events: rising, setting, upper and lower meridian transit (3 out of 4 these points are always displayed, depending of star's horizontal location).
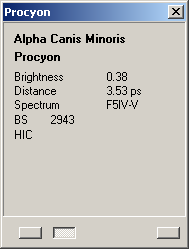
The second page displays some star parameters:
- Brightness (apparent magnitude)
- Distance from the Sun (in parsecs)
- Spectrum
- Bright Star and Hipparcos Input Catalog numbers (if available).
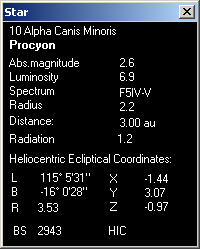
The third page displays other parameters:
- Absolute magnitude, defined as how bright a star would
appear if it were exactly 10 parsecs (about 33 light years) away from the Earth.
- Luminosity, (Sun = 1)
- Spectrum
- Radius, in Sun radii
- Distance from the observer
- Radiation, luminosity energy forces on the observer (the Sun at 1 au = 1)
- Heliocentric ecliptical coordinates (angular and rectangular)
- Catalog numbers.
Show...
The "Show..." option opens a new window containing an image of the selected object from an astronomical photo-album, if an appropriate file is available. The option has no effect if no graphics files are found. If there are several images for the object, you can select one from the submenu list.
Label
You can display an object's name permanently on the tableau - point the mouse at an object (a tooltip with its name should appear), click the right mouse button and select this menu item. To delete the label, repeat the procedure.
On the Internet
This item is enabled if the mouse is pointed at an asteroid (the "All Asteroids" option in Cosmos Settings must also be enabled - see below). Selecting this menu item, e.g. for asteroid "Amber", displays the following window:
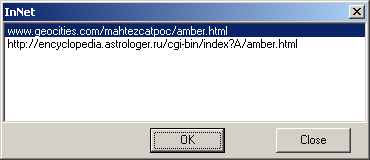
Select a URL link and click "OK" to connect to a Web site with a description of this asteroid (the name of the asteroid is inserted automatically).
You can modify the list of link templates, by editing the Asteroids\link.txt file.
Satellites
This option opens the Satellites window, which contains data on the planets (as satellites of the Sun), or on the moons of planets (after Jumping to a planet):
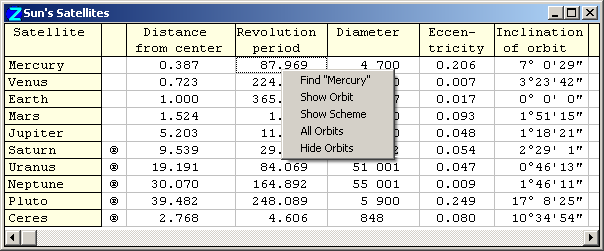
The data includes:
- Distance from the central body (semimajor axis of the orbit)
- Period of revolution
- Eccentricity
- Inclination of orbit
- Longitude of Node
- Longitude of Pericenter
- Longitude in orbit
- Diameter
- Inclination of Equator to the orbital plane
- Period of rotation
- Mass
Right-clicking the mouse in the Satellites data table displays a further popup menu:
- Find "[object]" - searches for the chosen satellite. If the object is known, the tableau is reoriented if necessary to display it (the observer may be relocated in the process!), and it is highlighted by a 'flash' in the tableau. The mouse pointer is relocated to it, with its name displayed on an info tooltip,
- Show Orbit - toggles on/off the display of a satellite's orbit on the tableau. If an orbit has been selected for display, the second column of the Satellites table contains a ® symbol,
- Show Scheme - displays the scheme of a satellite orbit. Schemes for display are indicated by a © symbol in the Satellites table. The scheme consists of the apsid lines and nodes of an orbit; the X/Y/Z-indicator of rectangular coordinates is transferred to the center of the system,
- All Orbits - displays the orbits of all satellites,
- Hide Orbits - removes orbits from the tableau display.
Find...
This option opens the Find Object window. See Searching for Objects.Motion
The "Motion" menu item displays a dialog with the option of activating permanent motion of the Cosmos tableau:
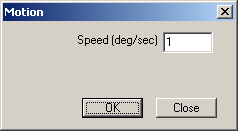
Input the desired speed and click OK (the dialog will be closed).
To stop the animation press the Esc key or click the tableau with the mouse.
Cosmos Settings
Display settings for the Cosmos tableau are available on its popup menu (right-click in the tableau). They are also available by selecting "Settings" from the main menu or clicking the "Settings" Toolbar button, then selecting the "Cosmos Settings" menu item.
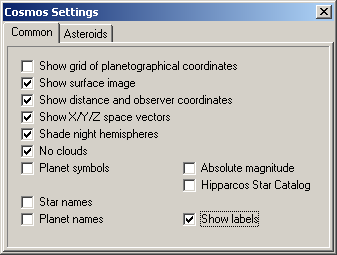
- Show grid of planetographical coordinates - superimposes a geographical grid of parallels and meridians onto planets' disks,
- Show surface image - creates photo-realistic images (textures) of planet surfaces. The planet's surface image, and the grid of planetographical coordinates, are visible only if the size of the planet on screen is sufficiently large to render them,
- Show distance and observer coordinates - displays the data at top-left of the tableau,
- Show X/Y/Z space vectors - displays the orientation axes of the observer in space,
- Shade night hemispheres - includes night shadowing on the planet surface images due to solar illumination of the planet,
- No Clouds - switches between two kinds of available texture for Earth's and Venus's surfaces: with clouds or without clouds,
- Planet symbols - displays the glyphs of planets at their locations on the tableau,
- Absolute magnitude - uses stars' absolute magnitude for their display, in place of their visual magnitude,
- Hipparcos Star Catalog - displays stars from the Hipparcos catalog (200 000 stars). Note, this option may severely slow down the performance of your computer,
- Star names - displays names of all named stars,
- Planet names - displays names of all planets (or satellites of central object),
- Show labels - displays the names of objects, which marked by "Label" option (see "Label" item of popup menu).
And also:
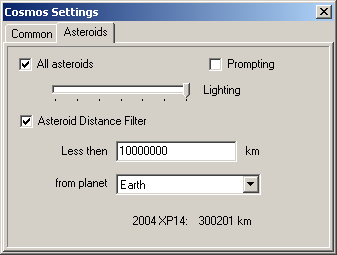
- All asteroids - if the Catalog of Asteroids has been calculated (filled with asteroids coordinates), this option displays all asteroids on the tableau as a cloudy 'bagel' of asteroids,
- Prompting: if not checked allows not show a prompt (the name of asteroid) when positioned by mouse (the name displayed only in window header), use with large quantity of asteroids and low computer power,
- Lighting: set size asteroids mark,
- Asteroid Distance Filter: allows to display only asteroids, approaching to specified planet near then specified value,
- Bottom of window displays data of nearest asteroid.
Surface Designer
With the Planet Surface Designer you can create simple (non photo-realistic) surface images for planets displayed as disks in the Cosmos tableau (if the Show surface image option is off). Planets have disks when you 'Jump' to them or when you approach them sufficiently closely.
A planet surface image is defined by a primary color for the surface and a set of pots.
A pot is defined by the following parameters:
- Area - type of pot, i.e circle or ring,
- Number - serial number of a pot (from 1 to 256),
- Longitude and Latitude - the planetographical coordinates of a pot. For a circle, the longitude and latitude of the centre of the pot; for a ring, the latitude at which it is located (in degrees),
- Radius of a circle or width of a ring (expressed as a decimal fraction of the radius of a planet),
- Name of a pot (for example, the name of a crater represented by this pot),
- Color of pot - the region fill color,
- Color of contour - the pot's border color.
The top two fields of the Surface Designer dialog contain the name of the planet (at left), and the names of files describing the object to the surface designer (at right).
To change the colors of a planet, area or contour pot, left-click in the Color panel across from the corresponding label.
Create button - effects the creation and addition of new pots with the specified parameters.
Change button - secures changes of parameters that define a staining tint or tone to be applied to areas of the object. (If the main color is changed, it is unnecessary to click this button as the color is automatically saved).
Delete button - naturally, deletes the current pot.
Multiply button - adds pots for 10 circular stains. The parameters of these are derived from the basic image and can be individually altered (excepting that the Radius setting cannot exceed the planet's radius).
Files containing planet surface descriptions are stored in the [ZET]\img\ folder, and have the names :
p2.img... p10.img, p2.nme... p10.nme.
Return to Sun
If the display is centered on a planet or star, selecting this menu option redraws the tableau with the Sun centrally in view.